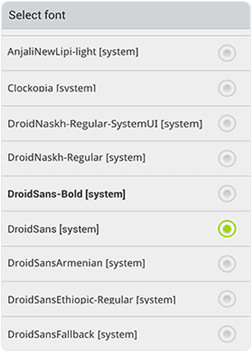
Method 1st:- Using GO Launcher Ex (For Non rooted Phone)
Steps To Change Fonts Using GO Launcher EXStep 1. First of all install GO Launcher from Google Play Store or by clicking the button below.
Step 2. Secondly you have to install GO Launcher Fonts from the Play Store or by clicking the button below. GO launcher fonts is an Amazing App that provide different fonts.
Step 3. Open the Go Launcher App and from the home screen tap the Menu button at right corner .
Step 4. Select the preferences from the menu then look for the font option.
Step 5. Now you see the list of fonts then select the font of your choice.Step 6. You can manually put the font files to the path /sdcard/GOlauncher Ex/fonts.
Step 7. After doing the changes, changes take place immediately without restarting the Phone.
Method 2nd:- Using Font Installer (For Rooted Android Phones)
Steps To Change Font Using Font Installer App
Step 1. Download and install Font installer App into your Android device by clicking the following button.
Step 2. Open and launch the App. Then look for the server Tab.
Step 3. In the server Tab you see a list of TTF font files which can be downloaded.
Step 4. You can view and install any of the font from the list. Tap the desired font and click on install.
Step 5. After that you see a backup message. Once your fonts are backed up you will be prompted to reboot your phone to reflect the desired fonts.
Steps To Use TTF Files
Step 1. If you have downloaded TTF file then you can copy your font file to /sdcard directory.
Step 2. Run the Font installer App and Backup your previous fonts. You have to grant Superuser or SuperSU permission when prompted.
Step 3. Now click on the local tap and find the TTF file that you copy on the sdcard.
Step 4. Click on the desired TTF file that you want to use and tap the install option to make it system font.
Step 5. Reboot your device to reflect the changes.


Show Konversi KodeHide Konversi Kode Show EmoticonHide Emoticon